Showing posts with label Sony Cybershot. Show all posts

Thursday, December 31, 2009

Transition from Point and Shoot to DSLR


Point and Shoot world talk about the optical zoom whether it is 10X Optical zoom, 12X optical zoom or so forth but in SLR world we talk about focal length range of 18 mm - 35 mm or 70mm - 300mm and so forth. Lets see the correlation between optical zoom and these focal length ranges.

Optical zoom is calculated as a ratio of maximum focal length to minimum focal length. Which means if a lens has a range of 18mm - 55 mm then its zoom factor is 55/18 = 3X Optical zoom and similarly for 70mm - 200mm lens zoom factor is 200/70 = 3X (approx). Thus we see that optical zoom in both the case is approximately the same but shots captured from them will be different, explained later below.

In the specifications of Point and Shoot cameras it will be mentioned : Optical zoom is 12x and focal length is of range 36mm equivalent - 432 mm equivalent. This does not means that lens used in point and shoot has a focal range of 36mm to 432 mm but actually might be 6mm to 72 mm. So why do they mention 36mm equivalent - 432 mm equivalent lens. This means picture taken from these lenses will feel the same as taken from 36mm lens - 432 mm in 35mm cameras.

Because many people are familiar with focal lengths of lenses for 35mm cameras, the digital camera manufacturers choose to describe the focal length of their cameras by reference to the focal length that would produce a similar field of view on a 35mm camera.

By describing the lenses this way, the digital camera companies appeal to users' familiarity with 35mm camera equipment.

Lets see in little detail:

Change of field happens because the sensor size is different in different cameras. (smaller the sensor size cheaper the camera, more noise at low light).

While normal film cameras take 35mm film (it is a standard for the industry) there is much variety between manufacturers on image sensor sizes. The main reference point that people therefore use is the 35mm one which is considered ‘full frame’ size.

Details on this can be found here http://www.panoramafactory.com/equiv35/equiv35.html

The CCD arrays on digital cameras are typically much smaller than the imaging area of 35mm film. This means that the focal length that produces a "normal" field of view is much smaller in digital cameras.

Let me show this by an example. Here I am using two cameras to show the difference Sony Cybershot DSC H2 and Canon EOS 350D.

Specifications about sensors size and lenses are below:

Sony DSC H2
Sensor size 5.75 mm X 4.31 mm.
Lens Focal Range = 6.0 mm - 72.0 mm
Lens Focal Range (35 mm equivalent) = 36.0 mm - 432 mm

Canon EOS 350D
Sensor size 22.2 mm X 14.8 mm
Lens Focal Range = 18.0 mm - 55.0 mm ; 70.0 mm - 300.0 mm
Lens Focal Range (35 mm equivalent) = 28.8 mm - 88.0 mm ; 112.0 mm - 480.0 mm

Top picture is from Sony at focal length ~ 70 mm and bottom one from Canon at focal length ~ 70mm. The picture shows the difference in angle of view due to different sensor size shot at 70mm focal length.

Now lets see how equivalent Focal helps


Top picture is from Sony at focal length of 70 mm which is equivalent to 432 mm in 35mm camera. Next picture shot from Canon at focal length 270mm which is equivalent to 432 mm in 35mm camera. These two pictures look similar even though at different focal length and gives an impression of picture taken from 35mm camera at 430mm focal length..

Because of the smaller format of DSLRs, telephoto lenses have a narrower angle of view than the same lens on a 35mm camera – this is the so called ‘crop’. Angle of View is simply that viewing angle which fills the frame (of any format). This determined by the film format in relation to the focal length of the lens – not the focal length on its own.

‘Crop’ is a fairly good term – the imaging area is physically smaller. Less of the image circle projected by the lens is used, therefore it is a crop. The image remains the same size at the film plane for a given lens and subject distance – it is in no way magnified. It does, however, take up a larger proportion of the (smaller) frame and so it is easy to see why some people call it a magnifying effect. This is also why a tele lens appears so much more powerful – the field or angle of view has been reduced. This is great for nature and sports photographers as the net result is more real pull than before with no trade off of maximum F Stop loss.

As an example: on a 35mm camera a macro lens focuses a 24mm long insect onto the film at same size – this is known as 1:1 ratio, or Life Size. 2.4cm on the film is about 2/3 of the frame in length so it will print to 2/3 of whatever (full frame) print size is made. On a DSLR with the same lens and at the same subject distance, the image at the film plane is still 2.4cm long at 1:1 or Life Size. However, 2.4 cm is about full frame in size and the subject will now occupy all the frame. For a given print size the subject will appear bigger in the frame. Thus it appears magnified compared to a 35mm camera.

Thursday, November 5, 2009

Shooting Airshow with Point and Shoot Camera


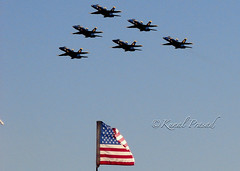
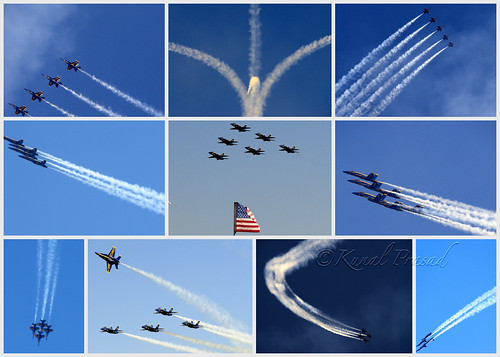
Taking interesting pictures at an airshow does not always require expensive SLRs. Last weekend I attended my first airshow ever. 25th Annual Wings Over Houston Airshow at Ellington Airport on Saturday, October 31 and Sunday, November 1 2009. I'd share with you what I learned so far.
All photos were taken with a Sony Cybershot DSC-H2, and I'm describing my experiences specific to this model.
I found these features useful:
Manual focus: Most things happen pretty far from you, so you can safely set focus to infinity and just shoot away without the delay needed by autofocus.
Custom settings memory: Some cameras will allow you to remember your favorite settings. Before the show, I programmed the camera to: zoom at maximum, manual focus set at infinity (see above), continuous drive mode and Aperture was set up to 1/1000 sec.

And thats it after this it was just click click click ...


On the picture on right I tried to get US flag to add some flavor to the pic.


Bright and clear sky added more savor but be prepared for the hot weather. Wear a hat and apply sunblocker on exposed skin. Also, be sure to drink a lot of water to prevent dehydration


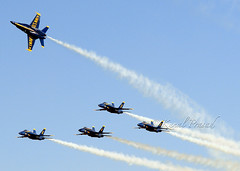
I used wide angle option for the photo above; the plane wasn't important, the smoke trail and vastness of the sky were.


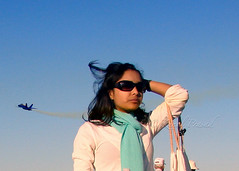
And the audience's reaction was as interesting as the show in the sky.


To know more about this airshow and about Blue Angels you can visit these sites

Monday, April 13, 2009

Take the help of Histogram

Working digitally has a number of benefits, one of the most important being that the colour, brightness and tonal values of the individual pixels that make up the image are recorded as soon as the image is taken.
These values can be reviewed in two ways on the camera's LCD screen - firstly, as the image itself and secondly as a graphic tonal represenattion which is known as a histogram.Being able to interpret histogram will help you to assess whether or not your image has the acceptable tonal value that make for a well exposed shot.

A histogram can normally be called up on the LCD screen on the back of your camera when shooting or playing back images. It is the form of graph where the x-axis (horizontal) represents the entire digital tonal range from black to white (0 - 255), while the y - axis (vertical) represents the number of pixels with a specific tonal value. The right side represents the maximum white values your camera can capture. On either end of the histogram the light values contain no detail. They are either completely black, or completely white. The top of the histogram (top of mountain peak) represents the number of different colors, a value you cannot control, so it is for your information only. We are mostly concerned with the left and right side values of the histogram, since we do have much control over those. (Dark vs. Light). An ideally exposed image would generate a symmetrical,humped shape histogram that smoothes gently out to the black and white points at either end of the histogram.

Below are some of the examples which will help you to understand Histogram.

As it is obvious this picture is underexposed and you can see in the histogram on the right corner of the picture. The pixels are bunched up on the left side of the histogram and there are very few pixels on the right side. This picture can be corrected by increasing exposure. This is discussed in previous blogs.


Same picture was taken with increased exposure and you can see in the histogram that pixels are spread more as compared to previous one and picture contains more detail.


This picture is overexposed. There are very few pixels in the dark areas (left side) and the pixels on the white side (right side) are climbing up the right hand border. This picture can be corrected by decreasing exposure as discussed in previous blogs.


These pictures are correctly exposed as all the pixels falls within the histogram range.


Next I will be dicussing about Composition

Saturday, March 28, 2009

Metering Modes

In order to produce an image that is not too bright (overexposed) or too dark (underexposed), all digital cameras need a way to access accurately how much light is present in the scene that is being photographed. Now cameras have built-in light meters that measure the light reflected from the subject or from the scene as a whole. The problem for the photographer is that the brightness can vary significantly from one part of the image to the next. For example, the sky is far brighter than the land during sunrise or sunset. If you were to set the exposure manually, the area you should set the exposure for depends on the result you want; normally you would set the exposure for somewhere between the two extemes. The way a camera arrives at this compromise depends on the type of metering system it uses.
How the camera measures light:

The exact method that different cameras use to measure exposure varies from model to model - but essentially there are three types of metering system commonly found on modern cameras. Three modes present in Sony Cybershot DSC-H2 are

1. Centre - weighted metering:

In this mode, the metering is biased or weighted to the centre of the view-finder (three boxes shown in the picture) and then averaged for the entire scene. This mode is very useful when taking portrait shots.

2. Spot Metering:

Spot metering in most cameras takes a reading from the very centre spot (black dot shown in picture) of the viewfinder (In Sony Cybershot it has flexibility to move this spot) and sets an accurate exposure for that part of the image only. This metering mode should be used when the subject is correctly exposed, no matter how much (or how little) light is falling on the surrounding areas, or during close-up photography.
In the above picture spot metering was used and a part of this picture was overexposed.

Both these pictures were shot at same time and I used spot metering mode for both but position of the spot was different. Spot was on the sky for the picture on left and it was on the bird for the picture on right.

3. Multi / Matrix metering:

This is most sophisticated of all the metering systems, and is the 'default' mode for the most cameras that offer metering option. It works by taking multiple readings from from various points in the scene, while also assessing the position of the main subject, foreground and back-ground, overall brightness, any front - or backlighting, colour and so on. The camera then compares these readings with a database of thousands of 'typical' photographic scenes and selects the exposure that most closely resembles one in its database.


My experience on Metering:
  • Pick the "Center-Weighted Metering" mode when you want the camera to meter the light in a broader area than with spot metering but not the entire frame. With center-weighted metering, you can focus on a larger portion of your frame. This is a good option when you’re taking group photos or portraits.
  • Select the "Spot Metering" mode when you have one small subject from which you want to record the light value. Spot metering is handy when your subject is in front of a bright background, such as a sunset. By choosing to spot meter the light from the subject only, your camera will adjust the settings, making your subject visible as opposed to creating a silhouette.
  • Choose the "Multi Metering" mode (multi-segment metering) for a good all-around photo. In most digital cameras, this is the default meter setting and it measures the light reflected in all parts of the frame and uses the combination to select the light value. For most purposes, matrix metering is sufficient.

Next I will discuss about Histogram

Saturday, February 21, 2009

ISO, Sensitivity and Noise in Digital Camera.

According to me a good camera is one which can take clear picture in low light without flash. This feature is achieved by ISO settings. Those who are familiar with film photography will know that different films have different ISO ratings. Even though your camera is most likely not film at all, but rather digital, the ISO setting still does has the same function as older film cameras. ISO determines how sensitive the image sensor is to light. A compact camera like Sony Cybershot have ISO settings of 50, 100, 200 and 400, while a digital SLR will often feature incremental settings of 100, 200, 400, 800, 1600 and 3200. Olympus E420 has a range from 100 till 1600. Higher the ISO setting, the more sensitive the sensor is to light which means signal created by light striking the sensor is amplified to greater degree.

Advantage of high ISO setting - avoid camera shake in low lights.

There is a direct correlation between shutter speed and ISO settings. By increasing the ISO settings, the shutter speed increases proportionately, for example, from 1/15 sec at ISO 50, the shutter speed increases to 1/30 sec at ISO 100 and 1/250 sec at ISO 800. At these later speeds, you'll avoid camera shake and can freeze slow movements.

Disadvantage of high ISO settings - causes grainy picture.

Unfortunately, there is a drawback to using high ISO settings as mentioned earlier amplifies electric signals which is applicable for background noise too which is present in camera's circuitry. This distorts the image signal and creates a speckled or noisy image.

Top left picture (Pic 1) is taken with ISO settings set to 100 and shutter speed was adjusted to 1/3 seconds. Top right picture (Pic 2) in right is the magnified version of Pic 1 which shows that the picture is slightly blurry because of hand shake while clicking the camera.
Bottom left picture (Pic 3) is taken with ISO settings set to 1600 and shutter speed was adjusted to 1/50 seconds. Bottom right picture (Pic 4) in right is the magnified version of Pic 3 which shows that the picture is grainy because of background noise. (click on picture to enlarge)

General Rules and tips for ISO Settings:

  • Use an ISO of 100 or 200 when taking photographs outside in sunny conditions.
  • If the sky is overcast or it is evening time, then use an ISO within the range of 400 to 800.
  • Night time or in cases of low light you might need to set your digital camera ISO to 1600.
  • Use Tripod if taking photographs at low ISO settings in overcast / low light conditions.

How to reduce noise from the picture.

  • Use camera which has got larger sensors because larger photosites found on such sensors collect light more effectively and thus don't need as much amplification to capture a poorly lit scene as a small sensor.
  • Now there are lot of photo editors in market (Adobe, Photosuite, Picassa) which helps to remove noise.

Next I will discuss about interesting stuff : Shooting and Composition.


Saturday, February 14, 2009

Digital Photography - Pixel and Resolution

My first experience with digital photography was in 2000 when my uncle presented a 0.5 MP Kodak digital camera. It was an amazing present I liked it a lot and started admiring digital photography from then. Things which I liked about digital camera as compared to analog camera was I can see my shots results instantaneously in the LCD screen and there is no recurring cost of developing and printing to view your shots. You just need to take your shots, connect the camera to computer and download pictures to computer and after that you can email it to your families and friends.
Building blocks of digital cameras is PIXELS, which is a short for 'PIcture ELementS'. An individual pixel carries information that governs its color, the strength of that color, and how light the pixel is displayed. In photography terminology these are termed as (HSB)
  1. Pixel's Hue,
  2. Pixel's Saturation, and
  3. Pixel's Brightness.
Each image is made up of million of pixels and number of pixel that an image has dictates the image's resolution.
More Pixel means

  1. Higher Resolution.
  2. Large Print Size.
  3. Large Disc Space.

Pic 1 is taken from 2 MP camera has 1600 x 1200 pixels, size on Hard Disk is 177 KB.

Pic 2 is taken from 6 MP camera ( Sony Cybershot) has 2816 x 2112 pixels, size on Hard Disk is 1.5 MB.

Pic 3 is taken from 10 MP camera (Olympus E420) has 3648 x 2736 pixels, size on Hard Disk is 1.9 MB.

As you might have noticed even though these pictures are taken from different camera of different pixel but still their clarity is pretty much same. That is because of Screen resolution / Print resolution which is measured in pixel per inch (ppi). Photo quality prints is 300ppi and computer's monitor has a standard resolution of either 72ppi (Windows) or 96 ppi (Macintosh). Which means if print area is small lesser megapixel camera will give almost the same kind of clarity as of high megapixel camera. Yes if we need to blow up this image then pic taken from 2MP will be most destorted and from 10 MP camera will be least.

So if we need to take pics to email friends and families and to get small prints we can achieve the same using lower MP camera and no need to spend money on higher MP cameras.

Below is the table which helps to determine what is the best print you can get from the range of 2MP - 12 MP cameras.


Next I will be discussing about ISO and Noise in Camera