Friday, January 15, 2021

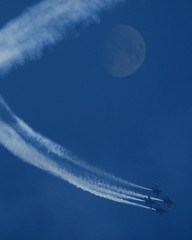
Soundless Flight


Inspiration for this work struck while I was in Galveston, Texas, USA. The sun was setting, bathing the beach in glowing orange and yellow and pink. Seagulls clamored for my attention: feeding one led to another, and another, until I was surrounded by them, their wings glinting with color. I found myself mesmerized by the way they flew, how they cut such precise shapes against the darkening sky, and I knew I needed to capture that moment. 


It took several trips before I found the perfect shot. One bird unmistakable in the foreground, another out of focus behind it, both caught in the last bright orange stripe of dying light. They were level with my eyes as I brought my camera up to snap the picture that would be the foundation of my creation. There's harmony in the colors I see here, a unity flowing between the beady glint of the seagull's eyes and the blending of colors, from orange to maroon to black. 

Looking at this art, I see freedom. A carefree flight, a sense of nonchalance that every grounded creature envies. I feel the weight of gravity, and I know that while I can't join the avian life populating our world, I will find my own liberation.

All photos are available for purchase as Limited Edition full-color prints. I use an archival 100% cotton fine art paper Photo Rag Baryta by Hahnemühle with an inkjet coating, giving it a high-gloss finish and standards that guarantee long-lasting color and saturation. Each print comes with a Certificate of Authenticity, indicating that you have purchased my original work. Each print is hand-signed, numbered, titled, and dated on the 2" white border. All prints are shipped rolled in a protective hard PVC tube to any country worldwide.

Photography: Color, Digital, Manipulated, Giclee on Paper.

Size: 24X36 (Photo Rag Baryta)

Link to purchase the art work Kreativelens Art Gallery

Tuesday, January 8, 2019

Kreative Workflow - Six steps journey of exposure from camera to printer


Step 1. At the photo shoot location, images are transferred to a portable drive.  I use RavPower Filehub Plus to transfer images.

Step 2. A folder is created and naming convention is followed as shown below

For Event Photography - Clientname_Eventname_Location
For Portrait - Clientname_Portrait_Location
Frnds & Family - FnF_Ocassionname_Location / FnF_Tripname_Date
Blog - Blog_BlogTitlename_Location
Concept Shoot - Conceptname_Modelname_Location
Workshop Shoot - Workshopname_Organizername_Location

Fixed name
Variable

Step 3. Images are transferred to work machine under Raw folder (stored in external hard drives).

Step 4. Images are brought to Lightroom and images are renamed. The naming convention is same as Folder naming convention and suffix by sequence id.

Step 5. Editing is done in LR and PS and final images are exported to Edited folder (Naming convention same as above).

Step 6. From edited folder, images are sent to printing lab and online gallery for client access.


Monday, November 5, 2018

Kreative Lighting - Split Lighting


ABOUT:

Split Lighting Setup for this portrait. Split lighting at its most basic level is constructed with a single light source placed 90 degrees offset from the subject and a bit higher than eye level, lighting one half of the face, and leaving the other in shadow.

The thing that distinguishes Split Lighting from Short or Broad lighting is the placement of the subject’s head- Split Lighting is usually taken with the subject facing square to the camera.

SETUP:

Light is next to the model at 90-degree angle.

MY TAKE ON THIS SET UP:

  • Simple to set up,
  • This creates more drama,
  • Usually applied to men, and
  • Create a sense of intrigue.

SAMPLES:

Collection of portrait pictures using Split Lighting set up from various photographers.

REFERENCES

Sunday, October 7, 2018

Kreative Lighting - Clamshell Lighting


ABOUT:

Clamshell Lighting uses two opposing light source. One from above at an angle of 45 degrees towards the model and the other one from below again at 45 degrees towards the model. Top light is the key light and the lower one is a fill light. If top light is set at 100% power then the bottom one will be set at 40% or lower.

SETUP:

Fill light should not be overpowering the key light.


Lower light is a fill light and is at 40% of its full power.


Upper light is a fill light and is at its full power.


MY TAKE ON THIS SET UP:

1. Simple to set up.
2. This light set up flatters practically any face.
3. Great for headshots.

SAMPLES:

Collection of portrait pictures using  Clamshell Lighting set up from various photographers.

References:


Monday, October 1, 2018

Kreative Lighting - Butterfly Lighting


ABOUT:

Butterfly lighting consists of a sole light aimed straight at the subject and raised high enough to create a downward shadow on the subject. This causes a butterfly shadow to appear directly under the subject's nose.

SET UP:


Here the shadow of the nose is directly under Mr. Kay's nose. Mr. Kay is facing directly towards the camera, the light is above camera pointing straight towards Mr. Kay's face.


The height of the light dictates the length of the shadow. I prefer shadow not to cross halfway distance between nose and lips.


MY TAKE ON THIS SETUP

1. Butterfly lighting accentuates cheekbones and jawlines. 
2. I do not find this lighting flattery on the weathered face.
3. I use this lighting on a young model with clear skin.
4. I avoid this lighting on a model with an oval face.
5. Use a reflector to fill in shadow under the chin.

SAMPLES

Collection of portrait pictures using  Butterfly Lighting set up from various photographers.

References
Picture Correct
Digital Photo
Improve Photography
Photography by Neilvan Niekerk

Tuesday, September 25, 2018

Kreativelens Workflow for Composite - 1


Composite consist of at least two images shot differently and is merged. To make two images blend and to look like one single image I follow these tips:

  • Matching Luminosity and Contrast,
  • Matching Saturation, and
  • Matching Tones

For simplicity, we will have two images one is background, and the other is a cut out of a model which we will refer to as a model layer.

  • Matching Luminosity and Contrast

Before matching the Luminosity and Contrast, we need to identify the luminosity and contrast level of the model layer to the background layer. To do so, we take a solid color layer and set the saturation layer of solid color is set to 0 and change the blending mode to color. This will convert the image to black and white, and then we can identify the brightest and darkest part of the background image and the model image. Use the curve tool to match the brightness and darkness of both layers (background and model). I usually have the model layer little brighter than background and background layer little darker than the model layer. Depending upon to which layer you are applying the adjustment curve you can clip the curve adjustment layer to that layer so that it is not affecting any other layer.
You can also use Lumenzia plugins to find the different level of luminosity.


  • Matching Saturation

Antti Karppinen is known for creating beautiful storytelling imagery; In his video in this link Antti's video, he describes the technique to match the saturation of composite. Steps involved are as follows:
First, we need to find out the saturation level of the colors which needs to be altered. Create a selective color layer set the radio button to Absolute. For colors Reds, Yellows, Greens, Cyans, Blues, and Magentas set the value of Cyan, Magenta, Yellow to -100% and Black to 0% and for Whites, Neutrals, and Blacks set the value of Cyan, Magenta, Yellow to 0% and Black to +100 %, this will convert the image to black and white, and the highest saturated color in the picture will be brightest. Once the highest saturated area is identified then either use curve or Hue Saturation adjustment layer to match the saturation of composite.


  • Matching Tones

In this video of Antti Karppinen Antti's video, he describes the technique to match the tones of the composite. Steps are involved as follows:
First, we need a color map of the composite which will help us to identify the area which requires our attention. To create the color map we need to get a solid color layer with 50% brightness and set the blending mode to Luminosity. To exaggerate the result, we add a Hue / Saturation layer and increase saturation to 100%. Once we have color mapping done then the objective is to have same color grading throughout the picture and to achieve this, we take help of Selective Color Layer and mainly modify color for Neutrals Whites and Blacks.


References:
Annti Karppinen
Kelbyone
Petapixel
Phlearn
Piximperfect Channel

Saturday, July 7, 2012

Adjustment Layer tweaks - Photo Filter

Use Adjustment Layers to fine-tune the tones and colors in your image with complete control.


When you first open an image in photoshop, you may decide to add more contrast, correct a color cast, convert to black and white or even turn your subject green. There are two ways to make adjustments as these. The first way is to go to image -> Adjustments and choose from the list of options. Any tweaks made here are applied directly to your image pixels. You can get perfectly good results by doing this, but what if later on you have second thoughts. The smart way to make any changes is to use Adjustment Layers. To apply these, click the circular icon at the bottom of the Layers palette or go to Layer -> New Adjustment Layer. Each adjustment you make appears in the layers palette as a separate layer that affects all layers below it. This means you can take advantage of all the editing choices that working with layers enables.

Photo Filter:

Photo Filter offers a handy list of preset color filters that mimic the effects of traditional lens mounted filters. Most Adjustment Layers comes with a list of presets and are usually accessed via a drop – down menu. These can be a great help, particularly if you're not sure exactly how to treat an image, as you can use them to kick-start your creativity.


Friday, May 28, 2010

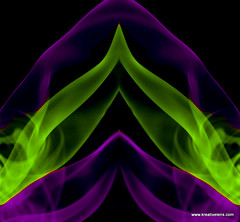
Smoke Art - Photography

Namaskaar
Smoke Photography can free your imagination. I was browsing Graham Jeffery’s (who has mastered the art of smoke photography) pictures and found it very impressive and fascinating. The link from his website contains his amazing work and also explains the technique to shoot smoke along with post processing tips on smoke shots. http://sensitivelight.com/smoke2/.

Here are few points which I learnt while shooting smoke
1.The cheapest way to get the “right” kind of smoke is using incense sticks.
2.Smoke is sensitive to even the tiniest of disturbances; use this to your advantage to sculpt your photo. Even smoke likes to dance on A.R. Rehman’s music.
3.Lighting plays a very important role while shooting smoke. You need a good depth of field (DOF) to capture all the details of a smoke column. To accomplish that you’ll need a well lit smoke with the most powerful source of light you can find.
4.The smoke produced by incense sticks is a light white color, so use a darker background. In this way you’ll have great contrast between the foreground and the background to better capture the nuances in the smoke. It’s common to see white smoke on a black background, and it’s easier to take the photo that way. But what about all those images with colored smoke with white background? Those are false negatives, created in post-processing.
5.To get the smoke focused can be difficult. Use any object or your own hand and place it the same distance as the smoke and use auto focus to focus it and after the auto-focus is done with its job, it’s time to turn manual focus on and start shooting without moving the camera.
6.ISO settings should be low as smoke has dust and you don’t want to introduce additional grains due to high ISO.
7.Once you get nice picture you can use any image processing software to post process the shots. Mainly cleaning up imperfections on the background, adjust contrast, sharpening, inverting, coloring, cropping ……

Link below discuss more about smoke photography and smoke art
http://www.smashingmagazine.com/2008/10/05/celebration-of-smoke-photography-and-smoke-art/

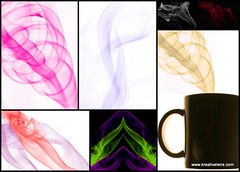
Smoke Collage

Thursday, May 6, 2010

Photographing Special Effects - Multiple Exposure

Moon Light
While your camera is adept at recording the real world, you can also use it to create fantasy images that will baffle and delight your viewers. Among the most notable of these special effects is multiple exposure – two or more images superimposed or juxtaposed.
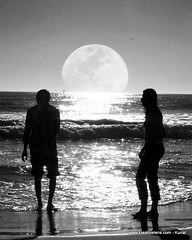
You might be wondering how there can be so many shots of American cities including a full moon when most buildings are too tall for a natural moonrise over the city skyline. The answer is simple: the magic of double exposure. I prefer this treatment because I can then decide exactly where I want the moon to be in my compositions.
In double and multiple exposures, one or more captures are combined to create a single well-exposed image. Thus if you want to create a double exposure, you must shoot two images, both underexposed by one stop, and combine them to get correct double exposure.
In some multiple exposures, much of the superimposed images will overlap. Try to make the images complement one another and distribute their tones to avoid too much exposure in one area and not enough in another.
Table below shows the exposure based on the number of images in montage.
Number of Images in montage
Number of f-stops to decrease exposure.
2
1
3
1 ½
4
2
5
2 ¼
6
2 ½
7
2 ¾
8
3

There is an important aspect to note about double and multiple exposures. Once an area is fully exposed to white, it cannot be exposed with any other color. This is one reason why you don’t see multiple exposures shot in snow.
Despite the need to be careful and precise, you will find that creating a double exposure is easy. You shoot the two compositions at one stop under the indicated reading.

Multiple Exposure

Multiple Exposure

Monday, February 22, 2010

Rear Sync - Flash

There's a setting on you camera that will help you get better-quality photos using flash. It's called Rear Sync, and what it basically does is change the time when the flash actually fires. Usually flash fires the moment you press the shutter button, so it does freeze any action in the scene, but it also generally makes everything solid black behind your subject (like you see in most snapshots). Changing to Rear Sync makes the flash fire at the end of the exposure (rather than the beginning), which lets the camera expose for the natural background light in the room first, and then at the very last second, it fires the flash to freeze your subject. Now your background isn't black - instead, it has color, depth, and detail, and this gives you a much more professional look all the way around. In the example below, the shot on the left is using the normal default flash setting (notice how dark the background is). For the shot on right, I switched the flash to Rear sync.


Give it a try and you'll see what I mean (just remember to keep the camera still when shooting in Rear Sync mode, because the shutter stays open longer- enough to expose for the background.)


This setting is very useful, while shooting in an aquarium where you want to capture the subject along with low light activities in background.

Monday, January 25, 2010

Depth of Field


While using point and shoot cameras never have given depth of field a second thought. Thats because the lens on a point-and-shoot, is deliberately designed to provide the maximum possible depth of field.
In fact it is one of the most important controls in photography. Depth of field can be used to disguise or soften objects within the frame, or to make a photograph look so sharp that it almost comes alive. A lens can focus precisely at only one distance at a time. To be completely sharp, the image must record points of light reflecting from the subjects as points of light on the sensor. Away from this plane of focus, points are recorded as minute circles, known as "circle of confusion". The larger these circles, the more out of focus the sot appears. For certain range of distances, the circles are small enough and to look like points, so the image appears sharp. This in focus range is known as the depth of field. For the 35mm format, the least circle of confusion is usually considered to be 0.0015in (0.036mm)

Three ways to affect depth of field.

1. Aperture - Making the aperture smaller increases the depth of field, while opening it up restricts it. The amount of available light also has some impact on depth of field. In low - light conditions only way to achieve a wide depth of field (using a small aperture of f/11) would be to have a long exposure of say, 2 sec or longer, in which case you'll certainly need a tripod. The opposite happens in very bright conditions, where the only way to achieve a very narrow depth of field (using a large aperture of f/2.8) would be to have an extremely fast shutter speed of, say, 1/4000 or even 1/8000 sec or use dark filter in front of lens.


Picture on left shot at A = f/35 , Focal length 617mm. Picture on right shot at A = f/4.5 , Focal length 617mm.

Due to larger aperture (f/4,5) out of focus subject is very very blurred.

2. Focused distance - At close distances, all lenses offer less depth of field than when they are focused farther away as seen below.


Both pictures shot at A = f/5.6 , Focal length 193 mm but focused on different object.

3. Focal Length - The amount of depth of field reduces dramatically as focal length lengthens.


Picture on left shot at A = f/5.6 , Focal length 193mm. Picture on right shot at A = f/5.6 , Focal length 64mm.


A point to be noted: Depth of field usually extends farther behind a focused subject than it does in front of it. The depth of field behind the focused point is approximately twice that in front.


Some informative links on Depth of Field.

Depth of Field Calculator
More on Depth of Field calculator


Thursday, December 31, 2009

Transition from Point and Shoot to DSLR


Point and Shoot world talk about the optical zoom whether it is 10X Optical zoom, 12X optical zoom or so forth but in SLR world we talk about focal length range of 18 mm - 35 mm or 70mm - 300mm and so forth. Lets see the correlation between optical zoom and these focal length ranges.

Optical zoom is calculated as a ratio of maximum focal length to minimum focal length. Which means if a lens has a range of 18mm - 55 mm then its zoom factor is 55/18 = 3X Optical zoom and similarly for 70mm - 200mm lens zoom factor is 200/70 = 3X (approx). Thus we see that optical zoom in both the case is approximately the same but shots captured from them will be different, explained later below.

In the specifications of Point and Shoot cameras it will be mentioned : Optical zoom is 12x and focal length is of range 36mm equivalent - 432 mm equivalent. This does not means that lens used in point and shoot has a focal range of 36mm to 432 mm but actually might be 6mm to 72 mm. So why do they mention 36mm equivalent - 432 mm equivalent lens. This means picture taken from these lenses will feel the same as taken from 36mm lens - 432 mm in 35mm cameras.

Because many people are familiar with focal lengths of lenses for 35mm cameras, the digital camera manufacturers choose to describe the focal length of their cameras by reference to the focal length that would produce a similar field of view on a 35mm camera.

By describing the lenses this way, the digital camera companies appeal to users' familiarity with 35mm camera equipment.

Lets see in little detail:

Change of field happens because the sensor size is different in different cameras. (smaller the sensor size cheaper the camera, more noise at low light).

While normal film cameras take 35mm film (it is a standard for the industry) there is much variety between manufacturers on image sensor sizes. The main reference point that people therefore use is the 35mm one which is considered ‘full frame’ size.

Details on this can be found here http://www.panoramafactory.com/equiv35/equiv35.html

The CCD arrays on digital cameras are typically much smaller than the imaging area of 35mm film. This means that the focal length that produces a "normal" field of view is much smaller in digital cameras.

Let me show this by an example. Here I am using two cameras to show the difference Sony Cybershot DSC H2 and Canon EOS 350D.

Specifications about sensors size and lenses are below:

Sony DSC H2
Sensor size 5.75 mm X 4.31 mm.
Lens Focal Range = 6.0 mm - 72.0 mm
Lens Focal Range (35 mm equivalent) = 36.0 mm - 432 mm

Canon EOS 350D
Sensor size 22.2 mm X 14.8 mm
Lens Focal Range = 18.0 mm - 55.0 mm ; 70.0 mm - 300.0 mm
Lens Focal Range (35 mm equivalent) = 28.8 mm - 88.0 mm ; 112.0 mm - 480.0 mm


Top picture is from Sony at focal length ~ 70 mm and bottom one from Canon at focal length ~ 70mm. The picture shows the difference in angle of view due to different sensor size shot at 70mm focal length.

Now lets see how equivalent Focal helps


Top picture is from Sony at focal length of 70 mm which is equivalent to 432 mm in 35mm camera. Next picture shot from Canon at focal length 270mm which is equivalent to 432 mm in 35mm camera. These two pictures look similar even though at different focal length and gives an impression of picture taken from 35mm camera at 430mm focal length..

Because of the smaller format of DSLRs, telephoto lenses have a narrower angle of view than the same lens on a 35mm camera – this is the so called ‘crop’. Angle of View is simply that viewing angle which fills the frame (of any format). This determined by the film format in relation to the focal length of the lens – not the focal length on its own.

‘Crop’ is a fairly good term – the imaging area is physically smaller. Less of the image circle projected by the lens is used, therefore it is a crop. The image remains the same size at the film plane for a given lens and subject distance – it is in no way magnified. It does, however, take up a larger proportion of the (smaller) frame and so it is easy to see why some people call it a magnifying effect. This is also why a tele lens appears so much more powerful – the field or angle of view has been reduced. This is great for nature and sports photographers as the net result is more real pull than before with no trade off of maximum F Stop loss.

As an example: on a 35mm camera a macro lens focuses a 24mm long insect onto the film at same size – this is known as 1:1 ratio, or Life Size. 2.4cm on the film is about 2/3 of the frame in length so it will print to 2/3 of whatever (full frame) print size is made. On a DSLR with the same lens and at the same subject distance, the image at the film plane is still 2.4cm long at 1:1 or Life Size. However, 2.4 cm is about full frame in size and the subject will now occupy all the frame. For a given print size the subject will appear bigger in the frame. Thus it appears magnified compared to a 35mm camera.