While using point and shoot cameras never have given depth of field a second thought. Thats because the lens on a point-and-shoot, is deliberately designed to provide the maximum possible depth of field.
In fact it is one of the most important controls in photography. Depth of field can be used to disguise or soften objects within the frame, or to make a photograph look so sharp that it almost comes alive. A lens can focus precisely at only one distance at a time. To be completely sharp, the image must record points of light reflecting from the subjects as points of light on the sensor. Away from this plane of focus, points are recorded as minute circles, known as "circle of confusion". The larger these circles, the more out of focus the sot appears. For certain range of distances, the circles are small enough and to look like points, so the image appears sharp. This in focus range is known as the depth of field. For the 35mm format, the least circle of confusion is usually considered to be 0.0015in (0.036mm)
Three ways to affect depth of field.
1. Aperture - Making the aperture smaller increases the depth of field, while opening it up restricts it. The amount of available light also has some impact on depth of field. In low - light conditions only way to achieve a wide depth of field (using a small aperture of f/11) would be to have a long exposure of say, 2 sec or longer, in which case you'll certainly need a tripod. The opposite happens in very bright conditions, where the only way to achieve a very narrow depth of field (using a large aperture of f/2.8) would be to have an extremely fast shutter speed of, say, 1/4000 or even 1/8000 sec or use dark filter in front of lens.
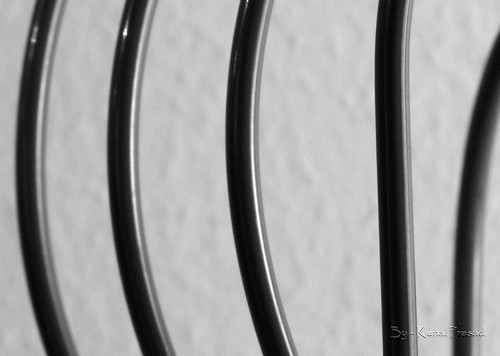
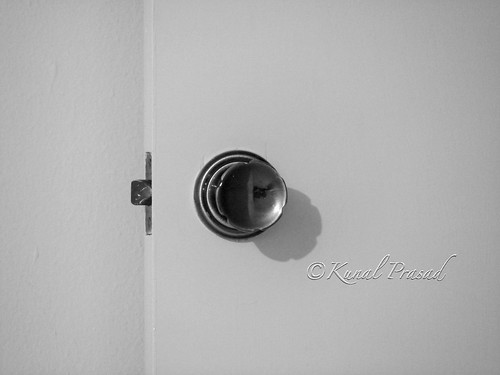
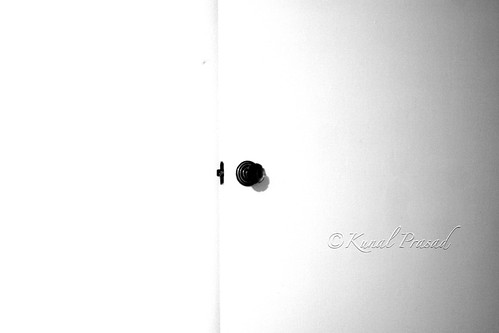
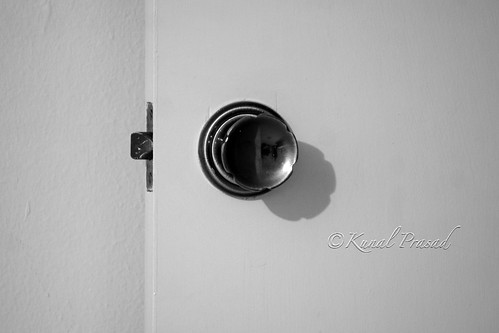
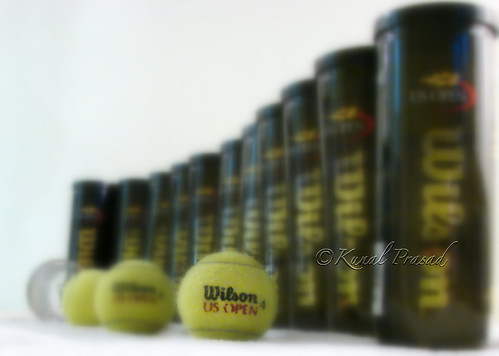
Picture on left shot at A = f/35 , Focal length 617mm. Picture on right shot at A = f/4.5 , Focal length 617mm.
Due to larger aperture (f/4,5) out of focus subject is very very blurred.
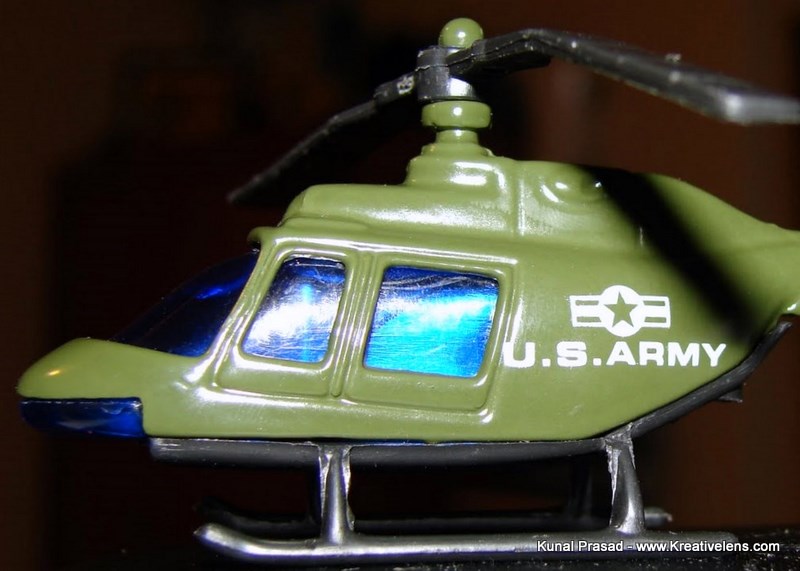
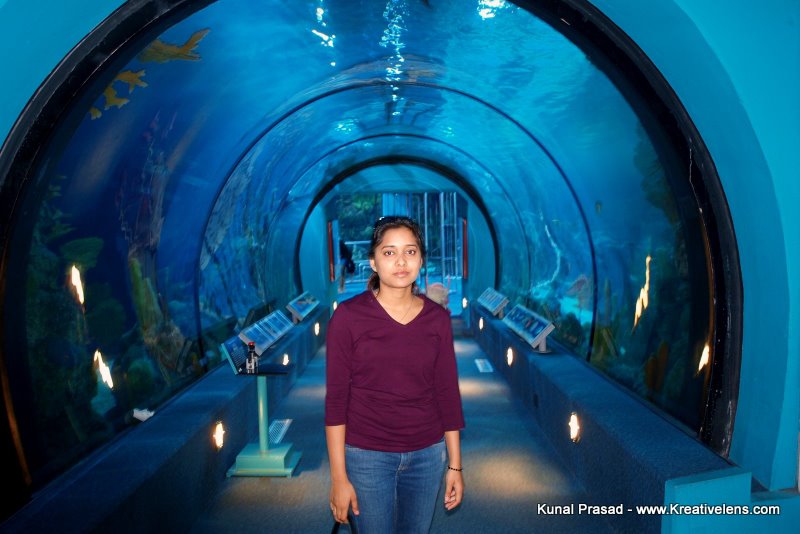
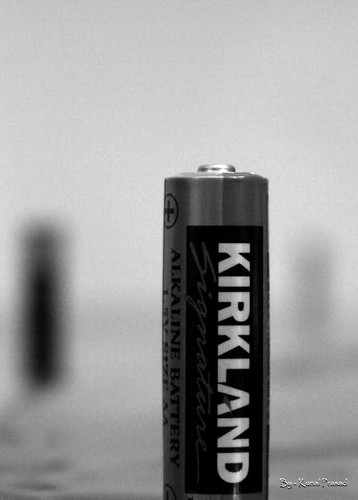
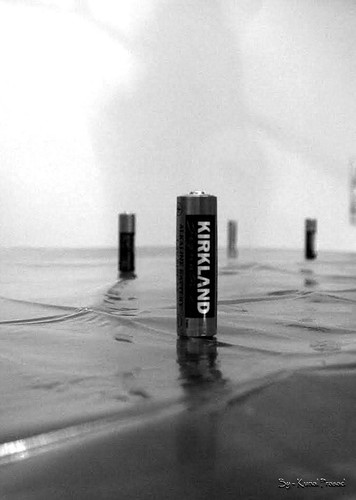
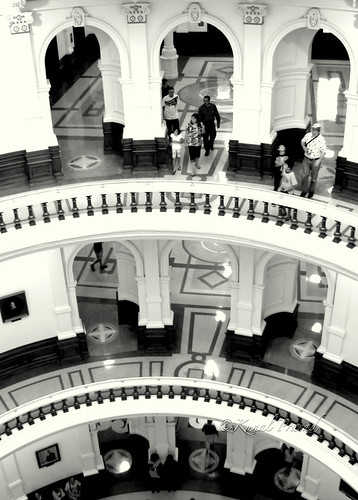
2. Focused distance - At close distances, all lenses offer less depth of field than when they are focused farther away as seen below.
Both pictures shot at A = f/5.6 , Focal length 193 mm but focused on different object.
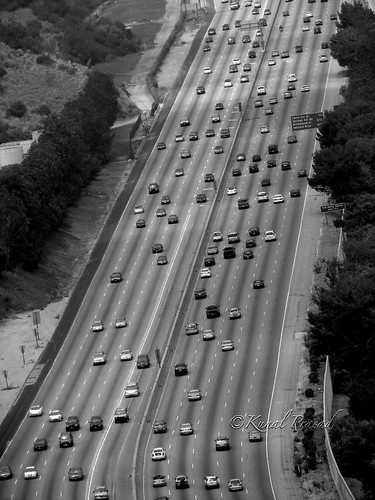
3. Focal Length - The amount of depth of field reduces dramatically as focal length lengthens.
Picture on left shot at A = f/5.6 , Focal length 193mm. Picture on right shot at A = f/5.6 , Focal length 64mm.
A point to be noted: Depth of field usually extends farther behind a focused subject than it does in front of it. The depth of field behind the focused point is approximately twice that in front.
Some informative links on Depth of Field.
Depth of Field Calculator
More on Depth of Field calculator